Crunchy Oil-Free Granola with Nuts and Dried Fruits
Discover my favorite oil free granola recipe! This crunchy, customizable blend of oats and nuts makes for a deliciously healthy breakfast or snack. Try it now!

- Craving a Crunch? Let’s look into into Oil-Free Granola!
- A Crunchy History Lesson
- Crunchy Goodness Awaits You
- The Perks of Homemade Granola
- Time to Gather Your Ingredients
- Essential Ingredients Guide for Homemade Granola
- The Art of Professional Cooking: Your Go-To Guide
- Pro Tips & Secrets for Your Oil-Free Granola Recipe
- Perfect Presentation
- Storage & Make-Ahead
- Creative Variations
- Complete Nutrition Guide
- Encouraging Conclusion
- Frequently Asked Questions
- Recipe Card
Craving a Crunch? Let’s look into into Oil-Free Granola!
Oh my gosh, has anyone else ever found themselves staring at the bottom of a cereal box, just waiting for a miracle to happen? i mean, i've definitely been there, especially on busy mornings when i just want something quick but also healthy.
This is where my oil-free granola recipe comes in – an absolute lifesaver! it's not just another breakfast; it’s crunchy, it's wholesome, and best of all, you can totally customize it to fit your mood.
I still remember the first batch i made. let’s just say the whole house smelled like a cozy bakery, and by the time it cooled down, i think i polished off half of it right off the baking sheet.
Honestly, it’s that good!
A Crunchy History Lesson
Granola has been around since the early 19th century. can you believe it? it all began as a health food, aimed at the wellness seekers of the time—it’s wild to think something so simple had a solemn start.
These days, granola is everywhere! it's the star of the breakfast table and a trendy snack choice. whether you’re enjoying it on its own or as a topping for smoothie bowls, its popularity just keeps growing.
The best part? making homemade granola is a breeze – we're talking about easy granola recipes that take little time but deliver big flavor.
You can whip up this oil-free breakfast idea in about 40 minutes, including just 15 minutes of active prep time! it’s perfect if you’re juggling a busy schedule but still want to eat something wholesome.
Plus, this recipe yields about six servings, so you’ll have plenty to share—or to hoard for yourself!
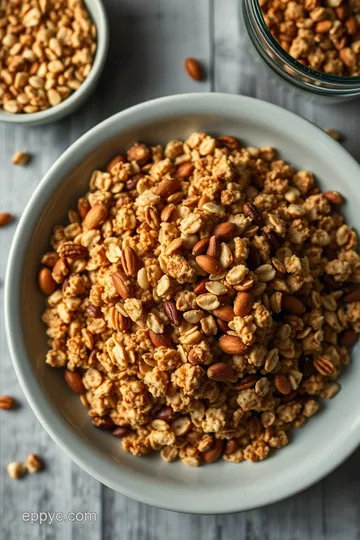
Crunchy Goodness Awaits You
There’s a ton of great stuff baked right into this granola. first off, we're using rolled oats, which are not just delicious but packed with health benefits.
Did you know that oats can help lower cholesterol? they’re basically the superheroes of the breakfast world! with just a touch of sweetness from honey or maple syrup, you get a nutritional boost without feeling heavy.
And let’s not forget about the nuts! they add a nice crunch along with healthy fats and protein.
So what's the catch? there isn’t one! you can get all of this deliciousness without any oil. that means it’s not only a low-fat granola snack but also a pretty guilt-free option for your mornings or those mid-afternoon cravings.
This recipe shines for parties, brunches, or just as an everyday treat when you're looking to show off your culinary skills without being fancy.
The Perks of Homemade Granola
Making your own granola opens the door to endless varieties. you can switch it up as needed! want to go nut-free? no problem; throw in some seeds instead! craving something sweet? add some dried fruits like cranberries or apricots.
Feeling adventurous? how about a sprinkle of cinnamon or a dash of nutmeg to give your homemade granola variations a tasty kick? with this recipe, you're in control, and that’s what makes it special.
Plus, there’s something completely satisfying about mixing your ingredients, watching it bake, and then finally enjoying a bowl. whether you’re scooping it into yogurt, mixing it into smoothie bowls, or just munching on it straight out of the container, granola is always a win.
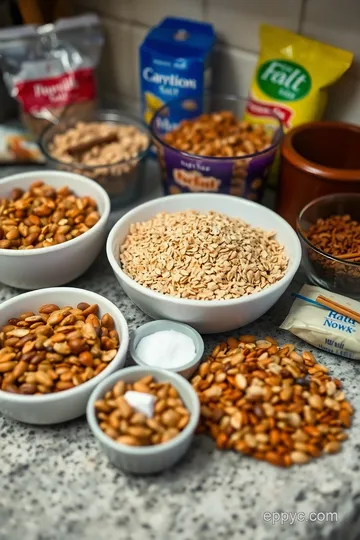
Time to Gather Your Ingredients
Ready to jump into the kitchen? you're going to need to gather some staples like oats, nuts, and maybe a few add-ins like seeds and dried fruits.
But don't worry; i’ll walk you through every step. this is where the real fun begins! grab those ingredients, and let’s make your very own crunchy oil-free granola !
Essential Ingredients Guide for Homemade Granola
Let’s dive right into the world of granola, shall we? whether you’re looking to whip up a healthy granola recipe or just want to snack on something that won’t make you feel guilty, i’ve got your back with this essential ingredients guide .
This will help you breeze through your granola-making journey like a pro!
Premium Core Components
First thing’s first, let’s talk about what you’ll need. Here’s a breakdown of the necessary ingredients to get you rolling.
-
Rolled oats: 3 cups (240 g) are key for that classic chewy texture. these babies are fiber-rich and among the best ingredients for granola .
Look for oats that say "rolled" or "old-fashioned" for optimal chewiness. store them in a cool, dry place. they last about 6-12 months in an airtight container .
-
Nuts and seeds: think of 1 cup chopped nuts (like almonds or walnuts) and 1/2 cup seeds (like pumpkin or sunflower).
Nutty goodness adds flavor and crunch. store these in the fridge to keep them fresh longer, or they’ll go rancid.
-
Sweeteners: you can’t skip the sweetness! go for 1/3 cup honey or maple syrup (about 100 ml). both are amazing natural sweeteners for granola .
Just remember, honey gives a different flavor than maple syrup, so choose your poison wisely!
-
Dried fruits: consider 1 cup of your favorite dried fruits. raisins, cranberries, or even apricots can go in there. just pick what's right for you! these add a delightful chewy contrast.
Get creative with flavors; the world is your granola oyster!
Signature Seasoning Blend
Now, onto the spices. You don’t just want to dump stuff in a bowl and call it a day. Here’s a simple yet effective seasoning blend :
-
Salt & cinnamon: adding 1/2 teaspoon of salt and 1 teaspoon of cinnamon elevates the flavor dramatically. trust me. salt brings out the sweetness like no other, and cinnamon adds warmth and comfort—perfect for those chilly mornings.
-
Customization: Want a kick? Add nutmeg or cardamom! Just sprinkle a pinch. You’d be amazed at how just a hint can transport your granola to new flavor landscapes!
Smart Substitutions
Life happens, and sometimes you run out of an ingredient. No stress! Here’s how to play fast and loose with some smart substitutions :
-
Nuts: If you’re looking for nut-free granola substitutes , consider using sunflower seeds or pumpkin seeds. They’re just as crunchy and easy on the tummy.
-
Sweetness: If you need that sweet fix but are staying clear of honey, try agave nectar or brown rice syrup as alternatives. They all do the job beautifully.
-
Dried Fruits: Fresh fruits can work in a pinch. You could even toss in freeze-dried fruits for added crunch!
Kitchen Equipment Essentials
All right, let’s gear up! Here’s what you’ll need to have in your kitchen to make cooking and storing a breeze:
-
Big Mixing Bowl: This is where the magic begins! Grab one that fits all your ingredients.
-
Baking Sheet: A good, sturdy one is essential for even baking. You want that golden-brown finish, right?
-
Parchment Paper: Less sticking, more winning! Plus, easy cleanup is a major bonus.
-
Airtight Container: This is how you’ll keep your crunchy granola fresh. A good container can keep your granola munchies around for up to two weeks .
Wrapping It Up
Got all that? awesome! homemade granola isn’t just about mixing and baking; it's about creating something that you and your family will enjoy.
Making this oil-free granola recipe allows for tailored tastes that fit everyone's cravings—plus, it’s simple!
In just a bit, I’ll walk you through step-by-step instructions on how to bring this crunchy goodness to life. Trust me, your mornings will never be the same (in the best way possible)! So grab your gear and let’s get cooking!
The Art of Professional Cooking: Your Go-To Guide
Let’s dive into the exciting world of cooking like a pro! it's not just about whipping up dinner; it’s about mastering techniques that make everything easier.
Whether you’re a boiled-egg connoisseur or a full-fledged grill master, having the right steps in your back pocket will boost your confidence and your kitchen game.
Ready? let’s roll!
Essential Preparation Steps
First off, we gotta talk about mise en place —a fancy term for having everything in its place. this is your game-changer, my friends.
Before you even think about cooking, gather all those ingredients and tools. have your 3 cups of rolled oats, 1 cup of nuts, and spices ready.
It’s like setting yourself up for success!
And speaking of success, let’s chat about time management . set a timer when you're cooking. it'll save you from that dreaded burnt toast moment.
You don’t want to let things get away from you! also, keep your workspace nice and tidy. organization is everything.
Got a bowl for scraps? use it. you’ll thank yourself when you’re not knee-deep in a mess.
Let’s not ignore safety! Always think about it. Like, when you're using sharp knives, keep those fingers tucked in. Nobody wants a kitchen horror story over a simple meal.
Step-by-Step Process
Alright, here’s the fun part! Let’s break it down step-by-step.
-
Preheat the Oven: Start by preheating to 350° F ( 175° C) for that perfect granola crunch.
-
Combine Dry Ingredients: In a large bowl, mix those oats, nuts, and spices.
-
Whisk Together Wet Ingredients: In another bowl, mix 1/3 cup of maple syrup and a splash of vanilla. Yum!
-
Mix Them Together: Pour the wet mix over the dry. Stir until everything’s coated nicely.
-
Spreading It Out: Line your baking sheet. Spread that mixture evenly; no one likes a lopsided granola!
-
Baking Time: Pop it in the oven for 20- 25 minutes . Stir midway to get that even golden brown.
-
Cool It Down: After baking, let it cool before adding any dried fruits. Cooling = crunchiness!
-
Store Properly: Keep your treasure in an airtight container. Your crunchy granola needs love!
You want to keep an eye on things in the oven. You know how sometimes things can go from golden to charred in seconds? Trust me, I’ve been there, and it’s not pretty!
Expert Techniques
Now, let’s take it to the next level. professional cooks know critical steps. always check the golden brown color for doneness—trust your eyes! and, make sure to jot down those important spices or add-ins you like.
Like, maybe you’re feeling adventurous and want to try nut-free granola substitutes or a vegan twist? go wild!
Here’s a little troubleshooting nugget: if your granola isn’t getting crunchy, it might need more time. But don’t go overboard; over-baking can lead to sad, burnt clusters.
Success Strategies
Now, let’s avoid some common pitfalls. Ever burned your granola because you just had to scroll Instagram while it was baking? Yep. We’ve all been there. Multi-tasking isn't always your friend!
Make sure to taste-test as you go! adjust the sweetness, maple syrup or honey can be your best buddy here.
And let’s not forget about variations. throw in your favorite dried fruits or seeds. customize your granola to your heart's content.
If you’re prepping ahead, keep it in mind that you can make a big batch for those busy weeks. just store it in a cool, dry place.
A little prep can go a long way for those easy breakfast ideas .
So there you have it! with this professional cooking method, you’ll whip up an oil-free granola recipe that’s crunchy and delicious.
From the kitchen safety tips to how to make granola that’ll make your mornings bright, you’re set to impress!
Stay tuned for more insights and tasty tips in the upcoming section: Additional Information ... Can't wait to share more with you!
Pro Tips & Secrets for Your Oil-Free Granola Recipe
Let’s dive into the nitty-gritty of making a killer oil-free granola recipe that’s not just healthy, but super delicious! i’ve made my fair share of granola disasters (think burnt bits and mushy textures)—trust me, you don't want that! so, here are some of my pro tips straight from the kitchen.
Chef's Personal Insights
Cooking is kinda like jazz: it's about improvisation! use maple syrup for a deeper flavor instead of regular sugar or honey.
Seriously, it uplifts your granola game! and don’t sweat too much about exact measurements. if you feel like going heavy on the nuts or tossing in some extra cinnamon, just do it!
Time-Saving Techniques
Prepping can be a time-suck. if you’re in a hurry, consider mixing your dry ingredients in bulk . maybe double or triple the batch? you can just pop it in an airtight container and have it ready for the week.
You could even let your kids help out! get ‘em stirring or measuring; it’s a great kitchen bonding experience.
Flavor Enhancement Tips
Want to make your granola sing? add some vanilla extract —it does wonders! and don’t be shy about spices. a teaspoon of nutmeg or even a sprinkle of ginger can transform your breakfast from basic to wow.
Oh, and if you’re feeling adventurous, toss in some dried fruit or even cacao nibs for that chocolatey crunch .
Presentation Advice
You eat with your eyes first, right? so, go all out with presentation. use colorful bowls and add in some fresh berries or banana slices on top.
Trust me, your instagram will thank you! a sprig of mint on the side could also add a lovely pop of color.
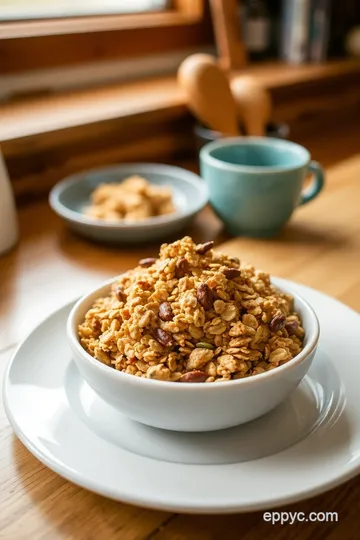
Perfect Presentation
Now that you’ve nailed your granola, it’s time to plate it up like the pro you are!
Plating Techniques
Try layering your granola in a mason jar with some yogurt for a simple yet fancy touch ! who doesn’t love a good layered look? it’s pretty and practical, especially if you’re meal prepping.
Garnish Ideas
A sprinkle of toasted coconut flakes or a few chocolate chips on top makes everything taste better. and if you want to get a bit gourmet, drizzle a bit of extra maple syrup before you serve.
Color Combinations
Mix and match your colors; the brighter, the better! Consider red berries, green mint, and even yellow banana slices. It’s like art—only edible!
Visual Appeal Tips
For maximum visual impact, consider using a large, white plate to let your granola stand out. Let those vibrant colors shine!
Storage & Make-Ahead
Knowing how to store your homemade goodness is equally crucial.
Storage Guidelines
Transfer your cooled granola to an airtight container . It keeps well for about 2 weeks . Just make sure to keep it in a cool, dry place—nobody wants soggy granola!
Preservation Methods
For longer-lasting crunch, you can freeze it! Just be sure to use a freezer-safe bag or container. It’ll keep for about 3 months .
Reheating Instructions
Got some leftovers? Just toss it back in the oven at 300° F ( 150° C) for about 10 minutes to revive that crunch!
Freshness Duration
Generally, your granola will stay fresh for about two weeks at room temperature , but if you freeze it, you can enjoy it for months.
Creative Variations
Here’s where things get fun. Your oil-free breakfast ideas can be wildly different!
Flavor Adaptations
Swap dried fruits for fresh ones or add nuts you love—maybe some pecans or hazelnuts? Your granola can change seasons just like your wardrobe does!
Dietary Modifications
If you’re gluten-free, use certified oats. If you’re vegan, as I mentioned earlier, sub honey for maple syrup. Got nut allergies? Throw in seeds instead.
Seasonal Twists
Think pumpkin spice in the fall or dried fruit in summer. Play around with different combinations each season . It keeps things exciting!
Regional Variations
Take inspiration from local shops. If you can find unique local ingredients, incorporate those! I love rummaging through farmers’ markets to see what seasonal treats I can add.
Complete Nutrition Guide
If you’re like me, you want to know what you’re eating. So, here’s a quick nutrition breakdown of your hard work!
Detailed Breakdown
Your oil-free granola is not only tasty but also packed with nutrients. With 220 calories per serving , you’re getting a decent protein punch thanks to those nuts and oats.
Health Benefits
Oats are known for their heart health benefits, plus they’re rich in fiber—what’s not to love there? They help keep you fuller longer!
Dietary Considerations
Watch your portion sizes, though. It’s so easy to go back for seconds—or thirds! But a small handful can go a long way in curbing those snack attacks.
Portion Guidance
About 1/4 to 1/2 cup is a good serving size, especially when paired with yogurt or almond milk.
Encouraging Conclusion
So there you have it, friends! your very own oil-free granola recipe complete with tips, tricks, and variations. with a little creativity, you’re set to enjoy a fantastic breakfast or snack that’s easy, healthy, and downright delicious.
Remember, cooking isn’t just about following the rules—it’s about making delicious memories. so roll up your sleeves, get in that kitchen, and start creating! you got this! 🥳
Frequently Asked Questions
What is an oil free granola recipe and how is it different from regular granola?
An oil-free granola recipe eliminates the use of oils, often replacing them with natural sweeteners or fruit purees for binding. This results in a lighter texture and often fewer calories, making it a healthier option for those looking to reduce fat intake while still enjoying a crunchy, flavorful snack or breakfast.
Can I customize the ingredients in my oil free granola recipe?
Absolutely! You can modify the nuts, seeds, and dried fruits to suit your taste preferences. For instance, swap out almonds for pecans, or use different dried fruits such as apricots or cranberries. Feel free to experiment with spices and sweeteners like cinnamon or maple syrup for a unique flavor.
What are some tips for making the perfect crunchy oil-free granola?
To achieve that perfect crunch, ensure you spread the granola mixture evenly on the baking sheet and stir halfway through baking for even browning. Also, let the granola cool completely before storing it, as this helps maintain its crisp texture. Don’t forget to keep an eye on it while baking to prevent burning!
How should I store my oil-free granola and how long will it last?
Store your oil-free granola in an airtight container, keeping it in a cool, dry place. It can last for up to two weeks at room temperature. For longer storage, consider freezing it, where it can stay fresh for up to 3 months.
Is oil free granola healthier than traditional granola?
While both types of granola can be nutritious, oil-free granola typically contains less fat and fewer calories, making it a lighter option. Plus, the absence of oil allows for a focus on whole ingredients like oats, nuts, and seeds, which are packed with fiber and protein, contributing to a healthier diet.
Can I use fresh fruits in my oil-free granola instead of dried fruits?
Using fresh fruit can alter the texture and moisture level of your granola, as they contain water that can make granola soggy. A better option is to use freeze-dried fruits which maintain crunchiness, or add fresh fruits as a topping once your granola is prepared for serving.
Crunchy Oil-Free Granola with Nuts and Dried Fruits Card
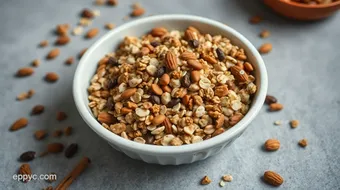
⚖️ Ingredients:
- 3 cups rolled oats (240 g)
- 1 cup chopped nuts (e.g., almonds, walnuts) (125 g)
- 1/2 cup seeds (e.g., pumpkin or sunflower seeds) (75 g)
- 1/2 teaspoon salt (2 g)
- 1 teaspoon cinnamon (3 g)
- 1/3 cup honey or maple syrup (100 ml)
- 1 teaspoon vanilla extract (5 ml)
- 1 cup dried fruits (e.g., raisins, cranberries, or apricots) (150 g)
🥄 Instructions:
- Step 1: Preheat the oven to 350°F (175°C).
- Step 2: In a large bowl, combine rolled oats, chopped nuts, seeds, salt, and cinnamon.
- Step 3: In a separate bowl, whisk together honey or maple syrup and vanilla extract until combined.
- Step 4: Pour the wet mixture over the dry ingredients. Stir well until everything is evenly coated.
- Step 5: Line a baking sheet with parchment paper. Spread the granola mixture evenly across the sheet.
- Step 6: Bake in the preheated oven for 20-25 minutes. Stir halfway through for even browning; bake until golden brown.
- Step 7: Remove from oven and allow to cool completely. Stir in dried fruits once cooled.
- Step 8: Transfer granola to an airtight container for storage.
Previous Recipe: Vibrant Vegetarian Tortilla Soup: A Hearty Mexican Delight
Next Recipe: Fluffy Almond Flour Pancake Recipe: A Deliciously Easy Breakfast