Mixing Cone 10 Black Stain for Pottery
Ever wondered how to achieve that stunning black finish in pottery? Join me as I share my favorite tips for mixing Cone 10 Black Stain for beautiful ceramics!

look into into the Art of Mixing Cone 10 Black Stain for Pottery
Have you ever stood in front of a beautifully crafted pottery piece and thought, “how did they get that deep, rich color?” it’s like a magic trick, right? well, it’s not just magic – it’s all about mixing cone 10 black stain for pottery ! trust me, once you dive into the pottery world, you’ll wonder why you didn’t start sooner.
I remember the first time i mixed my own stain; i was nervous and a little scared of messing things up.
But, oh man, the thrill of seeing that deep black hue come to life was so worth it!
A Bit of History and Pottery’s Modern Spin
Mixing potters have been at work for centuries, but today’s cone 10 black stain for ceramics gives a new spin on those old-school techniques.
Historically, getting that perfect black hue often involved trial and error with different techniques and iron oxide pigments . nowadays, with a bit of know-how about ingredients like gerstley borate and ball clay , mixing black stains can be a breeze.
In today’s pottery scene, the relevance of these stains is huge. potters love worked both functional pieces and artistic designs, and nothing says sophistication quite like a bold black finish in high-fire ceramics .
Whether you're trying to dress up your grandma's old vase or create something entirely unique, you'll find that mixing this stain isn't only desirable – it's downright necessary!
The Nitty-Gritty: What You Need to Know
Now, don’t let the idea of mixing your own stains scare you. honestly, mixing black stain for ceramics is a medium-level project – i’d say it takes about 25 minutes (plus a bit of extra time for drying if you’re applying it on test tiles).
You'll need some basic tools: think a digital scale, a non-reactive mixing container, and some gloves (it gets a bit messy, but we love that, don’t we?).
The cost of the ingredients is pretty reasonable, making it accessible for both beginners and seasoned pros. And let’s be real—being able to create your own custom pottery colors is pretty much priceless!
The Bright Side: Benefits of Mixing Your Own Stain
Let’s talk about the perks of whipping up your own black stain. first off, there's the health benefit of using non-toxic pottery materials .
You can create beautiful pieces while knowing you’re mixing safe ingredients. plus, the essential pottery equipment you’ll use is not just a fun hobby but also a skill that has artistic merit.
Using this black stain can elevate your pieces, making them perfect for special occasions. imagine your next gathering where your friends gawk over your new stunning plates! also, it offers unique advantages over pre-made stains – you can adjust the consistency until it’s just right for your design and project.
Honestly, what’s better than having the power to create exactly what you envision?
Getting Ready for the Ingredients
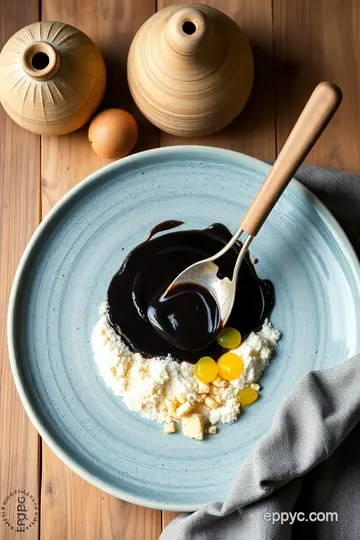
With all that intro behind us, let’s look at what goes into our cone 10 black stain magic! here’s what you’ll need: ball clay , black iron oxide , flint , and some water ! each plays a critical role in achieving that creamy, beautiful stain consistency that keeps your pottery pieces at their best.
So, now that you're all pumped up and ready to mix, we can get started on creating that perfect black stain for your pottery.
Grab your ingredients and let’s get our hands dirty!
Your Essential Ingredients Guide to Pottery Perfection
Hey there, pottery lover! whether you’re just starting with your ceramic creations or you’ve been in the game for a while, knowing your essential ingredients can be a game-changer.
From mixing that perfect cone 10 black stain to scoping out quality materials, let's dive into all you need for that fabulous pottery!
Premium Core Components
Let’s kick this off with the premium core components you need. first off, measurements matter; we’re talking 250 grams of ball clay or about 8.
8 ounces here. and if you’re a metric fan, that’s smack dab in the middle of the scale.
You wanna look for quality indicators too. don’t just grab any random bag of clay or stain. the right iron oxide pigment should have a deep, rich color.
Here's a quick tip: always check for a smooth, fine texture—those grittier bits? nope, not gonna give you that beautiful finish you're after.
When it comes to storage guidelines , keep your ingredients in airtight containers. they’re like your pottery’s best friends—no air, no moisture, no problem! as for shelf life , most ingredients last pretty well, but it’s good to check.
If a clay starts getting hard or an iron oxide looks funky, toss it out and get fresh.
Signature Seasoning Blend
Now, onto the art of seasoning —but we’re not talking cooking here. we're talking about spices of pottery mixing techniques ! get your hands on essential spices like black iron oxide and gerfley borate .
These are your heavy hitters for achieving that stunning black hue on your pieces.
When you mix your ingredients, think about herb selections and pairings of clays. ball clay’s properties are unbeatable for giving that wonderful plasticity.
Pair it with silica for those killer finishes that practically sing after firing.
Smart Substitutions
So you ran out of Black Iron Oxide while crafting? No worries! You can use Black Manganese Dioxide instead—just start with a little, as it can turn more concentrated quite quickly.
Also, if you want to go for more seasonal options , think about those diy ceramic stains you could whip up in the fall! natural pigments from plants can leave you with a fab earthy tone that’s perfect for autumn vibes.
Kitchen Equipment Essentials
Alright, let’s chat about your essential pottery equipment. a digital scale is non-negotiable. you wouldn’t bake without measuring cups, right? same deals apply here! get yourself a solid mixing container —nothing too fancy, but it should be non-reactive.
Now, don’t forget about safety! grab a dust mask for those times when you're mixing dry ingredients. trust me; your lungs will thank you later.
And while gloves are optional, having clean hands is awesome, especially when you’re working on those pottery finishing touches .
Bringing It All Together
To sum it up, having the right ingredients and equipment means you’re on the fast track to creating impressive pieces.
From understanding the effects of silica in pottery to making sure stain consistency during application, every little detail counts.
So, whether you're just slapdash mixing up a batch of cone 10 or aiming for advanced pottery crafting , don't skimp on mastering your materials.
Every up-and-coming potter—beginner or pro—can benefit from a deep understanding of what goes into their creations.
Next up, you’ll find a detailed guide on mixing your very own cone 10 black stain for pottery . stick around for the step-by-step instructions; i promise it’s gonna be as satisfying as pulling that final piece out of the kiln.
Happy pottery making!
An Intro to Professional Cooking Techniques
So, you’re ready to dive into the world of professional cooking ? awesome! whether it’s about whipping up a gourmet meal or experimenting with cone 10 black stain for pottery , starting off strong makes all the difference.
Let’s break it down step by step. think of this as your backstage pass to culinary greatness!
Essential Preparation Steps
First off, let’s talk mise en place . it’s a fancy french term that means “everything in its place.” seriously, it’s a huge game-changer.
Before you even turn on the stove, have all your ingredients prepped. veggies sliced, spices measured, and everything laid out.
It saves time and keeps you organized when the heat’s on. you know, when you realize you forgot to chop an onion right when your pan is sizzling.
Now, about time management tips . whenever you’re cooking, keep an eye on your clock. if a recipe says simmer for 20 minutes , set a timer.
Trust me; it’s so easy to get distracted. i once burned a sauce because i was scrolling through tiktok. lesson learned!
For organization strategies , keep your workspace clean. i love to wipe down my counters and clear the clutter as i cook.
It makes me feel all zen. plus, safety in the kitchen is key! always be cautious around those sharp knives and hot surfaces.
Step-by-Step Process
Here’s where the magic happens, folks. Follow these clear, numbered instructions:
-
Prep Your Ingredients:
- Gather everything on your counter.
- Wash, chop, and measure it out.
-
Heat Your Pan Properly:
- For sautéing, preheat your pan on medium-high heat—around 350° F .
-
Add Oil:
- Once it’s hot, add a splash of oil. You’ll hear a sizzle; that’s your cue!
-
Cook Times Matter:
- Let meats sear for about 3- 5 minutes on each side for perfect browning. Go by sight too—it should look golden and delicious!
-
Check for Doneness:
- Use a meat thermometer— 165° F for chicken, 145° F for pork. No one wants food poisoning, right?
Expert Techniques
Now that you’re cooking like a pro, let’s dive into some expert techniques . understanding the critical steps is crucial. for example, when mixing spices or flavors, taste as you go.
I can’t tell you how many times i’ve had to salvage a dish because i was too shy to adjust seasonings.
In pottery, it’s like crafting your ceramic colorants perfectly. achieving that rich, even tint in your black stain for ceramics requires patience and a keen eye.
Keep quality checkpoints in mind; if something looks off, it probably is!
Success Strategies
Okay, let’s keep it real—everyone makes mistakes. but let’s try to avoid the common ones. too much heat can ruin a dish; if things are burning, lower it.
In pottery, if your stain consistency feels off, adjust! like water in your stain, you gotta find that sweet spot.
For quality assurance, always taste your dishes before serving. It’s like checking your pottery test tiles before hitting the kiln. You want everything to shine!
Lastly, think ahead. if you're hosting a dinner, make some of the dishes ahead of time. for instance, sauces and marinades.
In pottery, you can create your diy ceramic stains in advance to let them set.
Wrapping It Up
Now that we’ve gone through the essential steps of professional cooking, you’re well on your way to culinary success! just like in pottery, cooking is an art, and each dish tells your story.
For a deeper dive into all things pottery—from mixing techniques to how to apply that beautiful cone 10 black stain for pottery —stick around for the next section on additional information .
We’ll make sure your culinary and crafting adventures are nothing less than spectacular!
The Ultimate Guide to Mixing Cone 10 Black Stain for Pottery
So, you’ve decided to dive into the mesmerizing world of pottery, huh? well, get ready because mixing cone 10 black stain for pottery is about to become your favorite new skill! this stuff is a game-changer for giving your ceramics that deep, rich finish.
I remember my first time mixing up a batch—what a thrill! i was so nervous i might mess it up.
But trust me, if i can do it, so can you!
Pro Tips & Secrets for Mixing Success
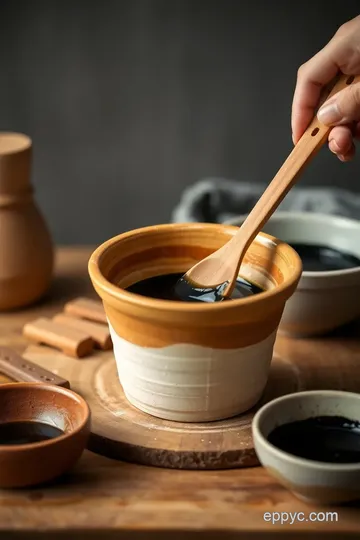
Let’s dish on some chef’s secrets . first off, consistency is key —that perfect stain consistency in ceramics can make or break your piece.
Mix those dry ingredients like you mean it! use a spatula, just like you’d use to fold in chocolate chips for cookies, and get everything blended well.
And if you want to save time, consider measuring out your materials in bulk. keep it simple; make several batches at once! you’ll thank yourself later when you’re ready to glaze your pottery.
Now, here’s the good stuff— flavor enhancement tips ! before you start applying that black stain, do test tiles. just a bit of stain on a small piece will show you how it reacts at high-fire temperatures.
It’s like a sneak peek into your pottery's future!
Perfect Presentation
Once your pieces are ready, how you present them matters too! Think about some plating techniques: a clean, bright display really highlights the beauty of your ceramics.
Garnish your table setup with some greenery, or use colorful textiles that contrast beautifully with your ceramic stain recipe . Bold colors next to black pottery? Yes, please!
Keep those color combinations in mind, too. a splash of bright red vase on a white table will always grab attention! visual appeal is not just about the piece; it's about the whole atmosphere you create.
Storage & Make-Ahead Tips
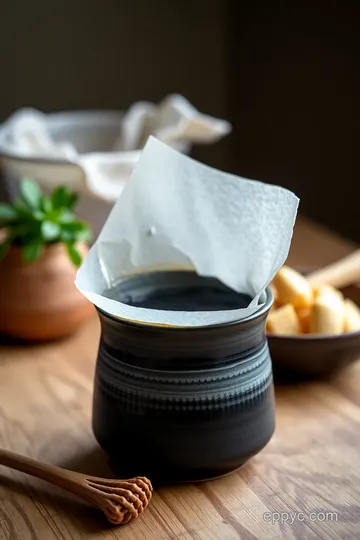
Now, what happens when you're done mixing? storage guidelines are vital here. keep your mixed stain in an airtight container! it’ll dry out quicker than you can say “pottery test tiles” if you leave it exposed.
Trust me, you’ll regret it!
If you’ve got extra stain, try freezer-friendly containers that let you portion out what you need for specific projects. when you’re ready to use it again, just thaw and go ! don’t forget to shake things up—literally! mix it again before use to ensure the right stain consistency in ceramics .
Creative Variations
Want to mix it up even more? explore those flavor adaptations ! adding metallic oxides can give you dazzling effects.
It’s like art on a whole new level! and if you’re feeling adventurous, why not try a seasonal twist ? darker stains paired with fall pottery can create stunning pieces!
Don’t forget about dietary modifications in your craft. if you’re looking for non-toxic pottery materials , look for stains from reputable sources that focus on safety.
Remember, even while crafting, it’s all about making good, safe choices!
Complete Nutrition Guide
Okay, okay, so we’re not mixing up a salad here, but let’s talk health benefits for just a sec. working with pottery can be quite therapeutic.
Seriously! there’s something about shaping clay that’s just soothing. and let’s not forget about the creativity that flows from your fingertips; it’s like yoga for your soul.
Expert FAQ Solutions
Got questions? you’re in good company. one common query is about mixing techniques. my advice? keep practicing! don’t get thrown off by one mishap.
And if you're unsure about a mix, refer to your pottery glaze mixing resources for help.
Need some troubleshooting tips? If things aren’t working, check your ratios! Those ball clay properties are essential for giving body and strength, and you want it smooth, not gritty.
Wrapping It Up
So, friend, ready to make some waves in the pottery scene with your high-fire ceramics ? embrace the chaos of mixing new ceramic colorants and trying new techniques! with a little patience, you’ll be crafting pottery with stunning black stains in no time.
And remember, it’s all part of your creative journey! every piece tells a story, including the bumps along the way.
Now go on, mix that Cone 10 Black Stain for Pottery , and let your creativity shine!
Mixing Cone 10 Black Stain for Pottery Card
⚖️ Ingredients:
- 250 grams Ball Clay
- 100 grams Black Iron Oxide (Fe₂O₃)
- 100 grams Gerstley Borate
- 50 grams Flint or Silica
- 2-5 grams Water (adjust as necessary)
🥄 Instructions:
- Step 1: Clear your workspace and ensure proper ventilation. Wear a dust mask and gloves for safety.
- Step 2: Using a digital scale, weigh out 250 grams of Ball Clay and add it to your mixing container.
- Step 3: Weigh 100 grams each of Black Iron Oxide and Gerstley Borate, and add to the container.
- Step 4: Finally, add 50 grams of Flint or Silica.
- Step 5: Mix the dry ingredients thoroughly using a spatula or a whisk until well combined.
- Step 6: Measure and add 2 grams of water. Mix until you have a homogeneous paste; adjust the water gradually for a thick, creamy consistency.
- Step 7: Apply a small amount to a test tile and fire it at Cone 10 temperature (typically around 2381°F or 1305°C) to see the final color.
- Step 8: Once satisfied with the result, store the stain in an airtight container to prevent drying out.
Previous Recipe: Easy and Delicious Bake Chicken with Garlic Herb Butter
Next Recipe: Ultimate Layered Butterscotch Shot with Irish Cream: 5 Delicious Tips!