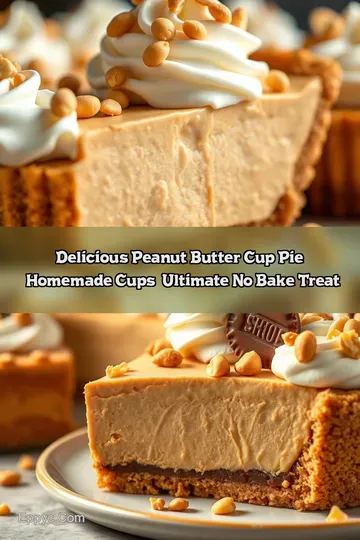
Peanut Butter Pie No Bake
Discover this easy peanut butter pie no bake recipe with silky peanut butter filling on a crunchy graham crust, topped with whipped cream. Perfect anytime treat!

- look into Into the Dreamy World of Peanut Butter Pie No Bake
- Your Go-To Guide: Essential Ingredients for the Perfect Peanut Butter Pie No Bake
- Mastering the Professional Cooking Method for Peanut Butter Pie No Bake
- Insider Secrets & Pro Tips for the Ultimate Peanut Butter Pie No Bake
- How to Plate Your Pie Like a Pro
- Storing & Planning Ahead Made Easy
- Get Creative: Fun Twists You Could Totally Try
- The Lowdown on Nutrition & Portion Control
- Frequently Asked Questions
- Recipe Card
look into Into the Dreamy World of Peanut Butter Pie No Bake
Okay, real talk—have you ever craved a dessert that screams comfort , but you're not really in the mood to wrestle with the oven? me too.
That’s when the magic of a peanut butter pie no bake comes crashing through like a cozy old friend with a big smile and a slice of pure indulgence.
I still remember the first time i tried whipping one up. i was juggling a million things, no time, and honestly, a bit intimidated by fancy desserts.
But this pie? oh man, it totally saved the day. it’s straightforward, doesn’t require heating the house up, and tastes just like a dream—silky, nutty, with that perfect graham cracker crumb hug.
This is the kind of dessert you want to call your go-to when people come over or when you need a sweet pick-me-up without the fuss.
By the way, if you're also someone who loves to personalize treats, this pie holds so much potential. you can toss in ideas from peanut butter cups homemade to keto peanut butter cups flavors or even play around with a bit of a cup cheesecake vibe by tweaking the texture a touch.
Seriously, it’s flexible and forgiving—making it a crowd-pleaser every single time.
A Sweet Slice of History With a Modern Twist
Now, the peanut butter pie no bake might not have deep, centuries-old roots like grandma’s apple pie, but it’s genuinely an american classic born from the era when quick no-bake desserts took off in the mid-1900s.
These pies reflect that post-war love affair with peanut butter, whipped cream, and convenience. it’s almost nostalgic—reminds me of those saturday night family dinners where simplicity met sheer deliciousness.
Fast forward to today, and peanut butter concoctions like the peanut butter cup pie and peanut butter cup cheesecake variants are having a serious moment.
Whether you’re scrolling through instagram or pinterest, people are sharing their luscious no-bake creations ready for everything from kid’s birthday parties to casual summer cookouts.
The popularity isn’t just hype; it’s because these pies hit that sweet spot of being fancy enough to impress but easy enough for even a kitchen newbie.
Speaking of easy, this pie clocks in at about 15 minutes of actual prep time. yup, 15! after that? it chills for around three hours, or overnight if you want it to set perfectly.
Difficulty level? honestly, it’s one of the simplest desserts i’ve made—if you can mix, fold, and chill, you’re golden.
Cost-wise, it’s really kind to your wallet too. ingredients are mostly pantry staples (peanut butter, cream cheese, graham crackers), and you get a full 8 slices that satisfy hungry crowds.
So, whether you're feeding a small family or a casual gathering, you get major bang for your buck.
Why This Peanut Butter Pie No Bake Is a Total Winner
So why do i keep making this pie again and again? for starters, it’s downright healthy-ish compared to heavier cakes—especially if you use natural peanut butter or go for the healthy peanut butter cups recipe vibe.
The protein from peanut butter and cream cheese combo gives a nice boost without the sugar overload.
It’s perfect for sooo many occasions—summer bbqs when you want no fuss, cozy movie nights, or even a “just because” treat on a chilly afternoon.
Plus, unlike some desserts that feel heavy and cloying, this pie has an airy, fluffy texture thanks to the whipped cream folding step, which really sets it apart from dense peanut butter cakes or heavy cheesecakes.
Oh, and let’s be real—if you’re a fan of cup pie styles or crave the richness of cake peanut butter desserts but hate baking, this no-bake pie is a lifesaver.
It’s that sweet spot between all those dessert worlds rolled into one luscious package.
I’ll be walking you through everything—from ingredients to assembly. but before you dive in, get ready to experience a dessert that’s creamy, dreamy, and so ridiculously satisfying without even turning on the oven.
Next up: grabbing those simple ingredients to make your own peanut butter magic happen!
Your Go-To Guide: Essential Ingredients for the Perfect Peanut Butter Pie No Bake
Alright, so you’ve probably daydreamed about a silky peanut butter pie no bake that just melts in your mouth, right? believe me, i get it.
I’ve tried my fair share of recipes, tweaked the filling here, swapped an ingredient there, all to get that perfect bite.
And boy, it all starts with nailing your ingredients. here’s my no-nonsense rundown on what makes or breaks this dreamy dessert.
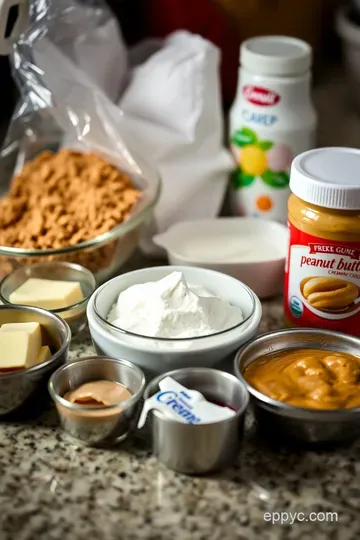
Premium Core Components: The Heart of the Pie
So first up, the base. you've got your graham cracker crumbs, unsalted butter, and sugar for that buttery, crumbly crust that holds everything together.
For measurements, think about 1 ½ cups (150g) graham cracker crumbs , 5 tablespoons (70g) melted unsalted butter , and 2 tablespoons (25g) sugar .
Using good-quality butter is key here. i learned the hard way that cheap butter can make the crust kind of waxy or oily—yuck.
As for peanut butter, don’t just grab any jar. look for creamy peanut butter with no added sugars or oils (unless you like the sweeter variety, then go ahead).
Natural peanut butter works wonders if you love that pure, nutty flavor. trust me, it makes your homemade peanut butter cups and pie taste like you raided a candy shop.
Keep your cream cheese softened but not melting—soft enough to whip but still firm. this makes the filling fluffier and smoother.
And always measure ingredients using a scale when you can ; it saves you from too-sweet or weird textures.
Pro Tip: Store your peanut butter and cream cheese in the fridge , and use them within 1–2 weeks once opened. Freshness totally affects flavor, no joke.
Signature Seasoning Blend: Beyond the Usual
Now, here’s where some folks overthink. the classic peanut butter pie doesn’t need a ton of spices, but a teaspoon of vanilla extract is your secret weapon.
It’s that little aromatic punch, turning "okay" into “oh-my-gosh.”
Want to get fancy? a pinch of sea salt on top balances the sweetness and brings out the peanut flavor beautifully (especially if you’re making healthy peanut butter cups or keto peanut butter cups on the side).
I sometimes toss in a hint of cinnamon or a touch of espresso powder when i’m feeling wild—it gives a subtle depth and pairs nicely if you’re also serving a peanut butter cup cheesecake.
But hey, different regions might add their twist, like using fresh rosemary or basil in the crust for something unexpected.
Smart Substitutions: Because Life Happens
Listen, sometimes you run out of this or that—don’t sweat it! Can’t find graham crackers? Oreos crushed fine work great for the crust; just nix extra sugar.
If you’re dairy-free or vegan, swap cream cheese with vegan cream cheese and heavy whipping cream with coconut cream . it won’t be exactly the same but still dreamy and perfect for summer.
For those on a keto kick, i’ve tried using almond flour crusts and sweeteners like erythritol for powdered sugar. the texture shifts but still satisfies sweet cravings without knocking you out of ketosis.
Emergency alert: no heavy cream? whip up chilled coconut milk or grab some silken tofu and blend it up for a creamy swap.
I’ve done this when stuck in a pinch, and honestly? it holds up surprisingly well.
Seasonal switch-up—pine nuts crushed into the crust instead of peanuts? Total win.
Kitchen Equipment Essentials: Keep It Simple
Alright, not everything needs to be fancy. for this peanut butter pie no bake , a 9-inch pie dish , mixing bowls, and a good electric mixer (or a strong arm with a whisk) are your best friends.
If you don’t have a mixer, just let your arms do the work! but be warned—whipping heavy cream by hand is cardio.
Also, use a rubber spatula to gently fold whipped cream into the peanut butter filling—that’s where you keep it light and fluffy.
Storage? keep your cool tools like measuring cups and spoons neatly together. a clean, chilled bowl helps—cold cream whips up so much better.
Freeze your spatula for a few minutes next time you’re about to assemble; it gives you smoother spreads!
Honestly, getting these ingredients right is half the battle won. The buttery crust, creamy peanut butter filling, and that smooth whipped topping—when combined perfectly—make every bite feel like a little celebration.
Speaking of which, ready to dive into the hands-on part? next up, i’ll walk you through the step-by-step to whip up your own show-stopping peanut butter pie no bake .
Trust me, once you nail this, you’ll be sharing your own peanut butter cups recipe with everyone at the next party!
Mastering the Professional Cooking Method for Peanut Butter Pie No Bake
Alright, so you want to whip up this dreamy peanut butter pie no bake that everyone raves about, but you’re wondering how pros make it look so flawless? let me spill the beans.
There’s a bit of science, a pinch of prep magic, and a sprinkle of patience involved. when you nail these steps, you’ll be serving up a pie that screams homemade, but with that restaurant-level finesse.
Essential Prep Work That Makes Life Easy
Okay, first things first — mise en place . this french term basically means “everything in its place.” sounds fancy, but it’s just about gathering all your ingredients and tools before you dive in.
Trust me, when you’re juggling graham cracker crumbs, peanut butter, cream cheese, and whipping cream, having everything lined up saves you from a kitchen meltdown.
Here’s a quick rundown:
- Measure your graham cracker crumbs, sugar, and melted butter.
- Soften the cream cheese well—leave it out for about 30 minutes . Instant softening tricks in the microwave? Nope, too risky for lumps.
- Get your bowls and mixer ready, and keep the heavy whipping cream super cold in the fridge until you’re ready to whip. Cold cream whips better —nothing ruins fluffy filling like warm cream.
On time management, set a timer for chilling the crust — about 15- 20 minutes in the fridge.
While that’s happening, mix your peanut butter filling. multitasking like a pro will cut your time in half.
Oh—safety first! Always keep raw dairy in the fridge and avoid cross-contamination. Clean your utensils after handling butter and cheese, especially if you’re making something like Healthy Peanut Butter Cups or Keto Peanut Butter Cups on the side — gotta keep that kitchen fresh!
Step-By-Step Like a Boss
Now for the juicy part: the process. Here’s how I break it down when I make my Peanut Butter Cup Pie or the ever-popular Peanut Butter Cup Cheesecake .
- Crust: Mix crumbly goodness—graham crackers, sugar, melted butter. Press it firmly onto your dish. No gaps! Chill for at least 15- 20 minutes at 40° F or lower to set.
- Filling: Beat the cream cheese and peanut butter till silky smooth. Add sifted powdered sugar and vanilla. Whip the heavy cream to stiff peaks (takes about 3- 4 minutes on high speed). Gently fold it in without deflating the mixture—light and airy is the key here.
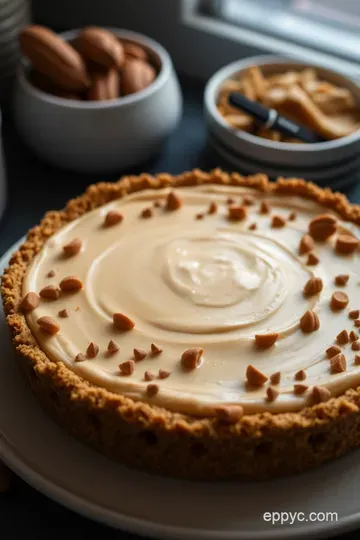
- Assemble and Chill: Spread the filling over the crust like an artist. Cover it and pop it in the fridge for at least 3 hours or better overnight. Chill temperature? Around 38- 40° F keeps everything firm but creamy.
- Topping: Whip your remaining cream with a little powdered sugar until soft peaks form. Smooth or pipe it on and toss on crushed peanuts or chocolate. Boom—showstopper!
Watch for visual cues: the pie should hold its shape, not wobble or look too loose. If it jiggles like Jell-O, it needs more chill time.
Pro Tips and Tricks
Here’s where things get interesting. honestly, the main trick is don’t rush. softened cream cheese is everything. once i tried rushing that step, and my peanut butter filling looked.
.. weirdly lumpy. no bueno.
Keep an eye on the whipped cream—if you overbeat, you get butter, and that’s a tragedy for a no-bake pie.
Folding in whipped cream should be slow and gentle—think of it like tucking in your filling with care.
Quality checkpoints? taste the peanut butter mixture before folding the cream. it should be sweet but balanced—not too sugar-bombed. too sweet? add a splash of vanilla or a pinch of salt to bring it back.
Troubleshooting? if your crust gets soggy (guilty), try chilling it longer before adding filling or sprinkle crushed nuts at the base for a barrier.
Also, if you want a richer, more decadent pie like a cake peanut butter texture, swap in some mascarpone cheese for cream cheese—trust me on this one.
Winning Strategies for Perfect Pie Every Time
Here’s what I learned from my kitchen fails:
- Don’t use room temp cream—it won’t whip well.
- Avoid overmixing when folding or you lose fluff.
- Don’t skip chilling—the chilling phase is your friend, especially if you want slices to stay intact like in those gorgeous Peanut Butter Cup Cheesecake slices you see on Pinterest.
Wanna prep ahead? No problem! The filling can be made a day before assembling, but don’t whip the topping too early—whipped cream hates waiting.
Remember, knife temperature matters when slicing—run your knife under hot water, wipe dry, and slice cleanly. Makes a huge difference.
Alright, now that your skills are sharpened and your pie is chilling in the fridge, you’re ready for the next bit — the additional information that’ll take your peanut butter pie love to the next level.
Stay tuned because there’s some seriously good stuff coming your way!
Insider Secrets & Pro Tips for the Ultimate Peanut Butter Pie No Bake
Alright, real talk—making a peanut butter pie no bake might sound simple, but there’s some serious magic in the little details.
When i first tried whipping up this dessert, i thought it was just mixing and chilling. nope! turns out, using cold heavy cream for the whipped topping is game-changing .
It whips up faster and holds its shape longer, which is clutch if you’re prepping ahead.
Here’s a quick trick i learned the hard way: don’t rush folding the whipped cream into the peanut butter mix.
Gently fold it—fold, don’t stir or beat! otherwise, you risk deflating that airy texture that makes this pie so dreamy.
Trust me, your taste buds will thank you for that fluffy filling.
And, if you’re feeling adventurous, try adding a hint of vanilla extract —it amps the flavor in a way that makes it taste homemade and special, just like the classic peanut butter cup pie from the candy bars we all secretly crave.
Oh, and whenever you’re in a pinch for time , chill that crust for at least 15 minutes—but if you can, an hour is ideal.
It keeps the crust nice and firm, stopping any dreaded sogginess.
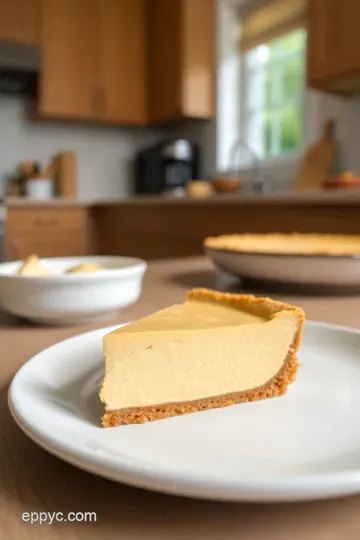
How to Plate Your Pie Like a Pro
Serving a pie that looks as good as it tastes is half the fun, right? i like to keep it simple but effective.
Presentation is everything with this dessert, especially if you decide to make a cup cheesecake version or jazz it up with some homemade peanut butter cups on top.
Start with a clean slice—use a knife dipped in hot water before cutting. this helps get smooth edges that don’t crumble like last week’s pinterest fail.
It sounds super fancy but takes less than 10 seconds and works like a charm.
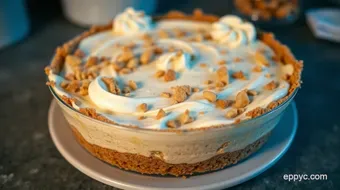
For garnishes? oh man, chopped roasted peanuts or a few peanut butter cups homemade pieces scattered across the whipped cream layer adds that perfect crunch and visual pop.
Throw in some dark chocolate shavings if you want to look extra bougie. color-wise, the warm tan of peanut butter and pale creamy white of the topping contrast beautifully—so avoid overloading with too many colors.
Keep it rustic and cozy.
Storing & Planning Ahead Made Easy
One of the biggest wins with this pie is how well it stores. Honestly, it tastes even better the next day because the flavors mellow out and blend.
Wrap your pie tightly in plastic wrap or pop it in an airtight container. you can keep it in the fridge fresh for about 3 to 4 days .
Don’t freeze it though—that crust can get kinda sad and soggy once thawed.
When it’s time to serve leftovers, just let it sit on the counter for 10- 15 minutes before digging in.
If it's been super cold, this softens the texture without melting the filling, keeping that delish creamy consistency.
Pro tip? Make this pie the night before a party or family get-together. It saves you last-minute fuss and means all you gotta do is add fresh garnishes before people arrive!
Get Creative: Fun Twists You Could Totally Try
I’m always on the lookout for new spins on classics, and this no-bake peanut butter pie is no exception. sometimes, i swap regular peanut butter for a homemade keto peanut butter cups flavor, cutting down on sugar and feeling less guilty about that indulgence.
If you’re keto or low-carb, definitely check out recipes for keto peanut butter cups —they make a wicked topping.
If you want to get seasonal, tossing in a little cinnamon or pumpkin spice into the filling gives it a cozy fall vibe.
Or go the extra mile and swirl melted chocolate into the filling to create a peanut butter cup cheesecake hybrid.
It’s like a mashup of all your favorite desserts.
For friends with allergies or specific diets, swapping out cream cheese for a vegan alternative and using coconut cream keeps it dairy-free and just as delicious.
The Lowdown on Nutrition & Portion Control
I’m not gonna lie—this pie isn’t exactly a health food, but it has some perks! peanut butter gives you protein and healthy fats, which can actually keep you fuller compared to a sugary cake peanut butter combo.
Each slice clocks in around 350 calories , and while it’s rich, a little goes a long way. i usually cut smaller slices because honestly, one is more than enough.
Pair it with a side of fresh fruit or some berry coulis for a lighter balance.
If you’re tracking macros or just keeping an eye on sugar, you can dial back on the powdered sugar or swap with natural sweeteners while sticking close to the original texture.
That’s how i created my go-to healthy peanut butter cups recipe for sneaking in dessert without the sugar crash.
Honestly, making a peanut butter pie no bake is like comfort in dessert form. it’s quick to throw together, tastes incredible, and brings back that nostalgic peanut butter cup vibe we all love.
Whether you keep it classic or experiment with my pro tips and creative variations, this pie is a guaranteed showstopper at any gathering.
Plus, it’s perfect for those days when you want to wow folks but don’t wanna sweat in a hot kitchen.
So next time you're craving something sweet but simple, give this pie a shot—you might just find your new dessert obsession.
And hey, while you’re at it, why not try your hand at some peanut butter cups homemade to keep the peanut butter love going strong? trust me, your taste buds will thank you!
Frequently Asked Questions
Can I make a peanut butter pie no bake ahead of time?
Absolutely! In fact, this no-bake peanut butter pie tastes even better after chilling overnight. Allowing it to set for at least 3 hours (but ideally overnight) helps the filling firm up and flavors meld, so it’s perfect for prepping in advance for parties or special occasions.
What’s the best way to store leftover peanut butter pie no bake?
Store any leftovers tightly covered in the fridge to keep the crust crisp and filling fresh. It should keep well for 3-4 days. If you notice the crust getting a bit soggy, simply enjoy the pie sooner rather than later, or consider chilling it separately if possible.
Can I substitute peanut butter in a peanut butter pie no bake?
You can swap regular creamy peanut butter for natural or unsweetened versions for a less sweet, more intense peanut flavour. For those with allergies or preferences, almond or cashew butter can also work, but the taste and texture will vary slightly. Just be sure to use a smooth nut butter for the creamiest filling.
How do I keep the filling light and fluffy in a no-bake peanut butter pie?
The key is folding in properly whipped cream gently into the peanut butter and cream cheese mixture. Whip the cream to stiff peaks using cold heavy cream, then carefully fold it in to preserve the aeration—overmixing will deflate the mixture and make the pie dense rather than silky and dreamy.
Are there any easy variations or toppings to jazz up this peanut butter pie no bake?
Definitely! You can add chocolate swirls by folding in melted chocolate or sprinkle chopped peanuts, chocolate shavings, or even a drizzle of caramel sauce on top for extra indulgence. For a fruity touch, sliced bananas or fresh berries pair wonderfully, giving a British Bake Off-style flair with little effort.
Is peanut butter pie no bake a suitable dessert for those watching their calorie intake?
This pie is rich and creamy, so it's quite indulgent with around 350 calories per slice. If you're mindful of calories, you can reduce portion size or try substitutions like reduced-fat cream cheese or natural peanut butter without added sugar. Remember, a small slice can still satisfy your sweet tooth without going overboard!
Peanut Butter Pie No Bake Card
⚖️ Ingredients:
- 1 ½ cups (150g) graham cracker crumbs
- 5 tablespoons (70g) unsalted butter, melted
- 2 tablespoons (25g) granulated sugar
- 1 cup (250g) creamy peanut butter (natural or regular)
- 8 oz (225g) cream cheese, softened
- 1 cup (120g) powdered sugar, sifted
- 1 ½ cups (360ml) heavy whipping cream, cold
- 1 tsp vanilla extract
- ½ cup (120ml) heavy whipping cream
- 1 tablespoon (15g) powdered sugar
- Optional: chopped peanuts or chocolate shavings for garnish
🥄 Instructions:
- Step 1: Combine graham cracker crumbs, melted butter, and granulated sugar in a bowl.
- Step 2: Press mixture firmly and evenly into the bottom and up the sides of the pie dish.
- Step 3: Chill in the fridge for 15–20 minutes to set.
- Step 4: Beat softened cream cheese and peanut butter together until smooth and creamy.
- Step 5: Gradually add powdered sugar and vanilla extract, mixing until well combined.
- Step 6: In a separate chilled bowl, whip the heavy cream to stiff peaks.
- Step 7: Gently fold the whipped cream into the peanut butter mixture, preserving the airy texture.
- Step 8: Spoon the filling over the chilled crust, smoothing the top with a spatula.
- Step 9: Cover and refrigerate for at least 3 hours or overnight to firm up.
- Step 10: Whip the remaining heavy cream with powdered sugar until soft peaks form.
- Step 11: Spread or pipe the whipped cream over the pie just before serving.
- Step 12: Garnish with chopped peanuts or chocolate shavings if desired.
Previous Recipe: Easy & Flavorful Hot Sauce Recipes: My Secret Pepper Sauce Method
Next Recipe: Succulent Herb-Crusted Bottom Round Roast Recipes for Sunday Dinner