Rustic Cattle Guard Cookies: Chocolate and Nut Treats
Bake delightful cattle guard cookies with rich chocolate and nuts! Perfect for tea time or a cheeky snack. Discover my easy recipe today!

- Introducing the Cattle Guard Cookies: A Sweet Adventure in Every Bite
- A Little History on Cattle Guard Cookies
- Why You Need Cattle Guard Cookies in Your Life
- Ready to Get Baking?
- Your Ultimate Guide to Kitchen Essentials
- Mastering the Art of Professional Cooking
- Additional Recipe Information for Cattle Guard Cookies
- Frequently Asked Questions
- Recipe Card
Introducing the Cattle Guard Cookies: A Sweet Adventure in Every Bite
You ever stumble upon a recipe that just feels right , like an old pair of jeans you’ve had since high school? well, that’s how i felt when i decided to whip up these cattle guard cookies .
The name might sound funny (what even is a cattle guard in the kitchen?), but once you take a bite, you’ll understand.
They’re like rustic little gems, reminding me of those lazy afternoons spent baking with my grandma. we’d chat about everything under the sun while flour dust floated through the air.
Ah, those were the days!
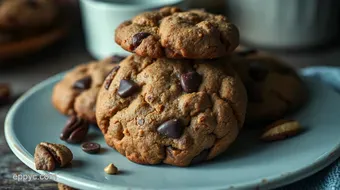
These cookies are a delightful mix of textures—crispy on the outside and chewy on the inside—almost like the strong but welcoming presence of a cattle guard entrance .
You know, it’s like they open up a world of flavors right in your own home. imagine rich chocolate chunks meeting crunchy nuts—it’s a love story for your taste buds, folks!
A Little History on Cattle Guard Cookies
So, what's the deal with these cookies? they aren’t straight out of some fancy culinary school. nope! they’re rooted in the traditional charm of country kitchens, where comfort food reigns supreme.
The inspiration? well, cattle guards used on ranches to keep cattle where they belong and give a bit of a rustic vibe to any farm.
It's interesting how something so practical can lead to such a delicious treat, right?
Today, these cookies are all the rage! perfect for parties, bake sales, or just because you’re craving something sweet. and don’t even get me started on how easy it is to whip them up.
You can dive in with just 57 minutes of your time, and trust me, the reward is way more than the effort.
Why You Need Cattle Guard Cookies in Your Life
Health Benefits and Nutrition Highlights
Now, i know what you’re thinking. cookies? healthy? well, hold your horses! let’s focus on the mix-ins here. who can say no to antioxidants from dark chocolate and some heart-healthy nuts like walnuts or pecans? plus, a well-rounded sweet treat can make your day a little brighter.
These cookies have that perfect balance. They fill your cravings without leaving you feeling like you’ve eaten a brick. And let’s be real: who wants to feel sluggish after a sweet treat? Not us!
Perfect for Any Occasion
These beauties aren’t just for the average tuesday afternoon. they shine at birthday bashes, weekend barbecues, or even that cozy movie night at home.
Trust me; these cookies are the diy stocking holders of the dessert world—fun, functional, and perfect for sharing.
Key Advantages Over Similar Recipes
So, what sets these cookies apart from the rest of the cookie realm? well, it's all about that crisp-chewy combo and the rich chocolate that flows through every bite.
You’ll feel like a gourmet chef without all the fuss. plus, they travel well—make a batch and take them to your next gathering.
Ready to Get Baking?
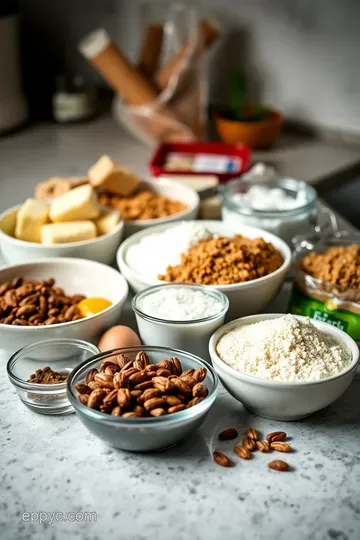
Now that i've convinced you that these cookies are in fact a must-try, let's get into the nitty-gritty . you’ll need to gather some simple ingredients , and don’t worry; it doesn’t break the bank.
Most of them are probably already hanging out in your pantry. just grab some chocolate, butter, nuts, and flour, and you’re on your way to cookie heaven.
Stay tuned, because the next section is going to lay out exactly what you need and how to bring these cattle guard cookies to life! trust me; once you start baking, you’ll be more than ready to share those warm, tasty bits of joy with your friends and family.
Your Ultimate Guide to Kitchen Essentials
Let’s be real, getting into cooking can feel like a wild west adventure. but fear not, my friends! having the right ingredients and equipment is like having the cattle guards of your kitchen—keeping everything in check so you can focus on the fun stuff: cooking up a storm.
Whether you’re prepping for your next family barbecue or just whipping up a quick weeknight meal, these essentials will be your trusty sidekicks.
Premium Core Components
First up, let’s talk about the premium core components . You want a solid base for your kitchen, right? Here are the must-have goodies:
-
Detailed measurements: whether you’re measuring in cups or going metric, precision is key. for instance, if a recipe calls for 1 cup (237ml) of flour, don’t eyeball it.
Get a good cup measure and stick to it. trust me, your cookies will thank you!
-
Quality indicators: not all ingredients are created equal. when it comes to olive oil , for example, look for labels that say “extra virgin.
” that stuff is liquid gold! and your taste buds will know the difference.
-
Storage guidelines: store your spices in a cool, dark place—nobody wants stale cumin ruining a curry! most spices have a shelf life of about 6 months to a year .
If they’re dusty and lacking aroma, pitch ’em!
-
Freshness Tips: Always check for the harvest date if you can. Fresh herbs should look bright and lively. Thankfully, my backyard herb garden gives me an endless supply of basil and cilantro, and they’re like the green superheroes of my recipes!
Signature Seasoning Blend
Moving on to the signature seasoning blend , because flavor is everything.
-
Essential Spice Combinations: Think salt, pepper, chili powder , and garlic salt—classic combo right there. These basics can go in nearly everything from chili to popcorn.
-
Herb Selections and Pairings: Fresh herbs are game-changers. Rosemary goes beautifully with roasted potatoes, while basil adds a fresh kick to tomato sauces.
-
Flavor Enhancers: A dash of lemon juice can brighten up the heaviest dishes! You’d be surprised what a little zing can do.
-
Regional Variations: Love Tex-Mex? Toss in some cumin and paprika! Craving Italian? Let’s get generous with the oregano and thyme. The world is your seasoning oyster!
Smart Substitutions
We all have that moment when we realize we’re out of an ingredient—that’s when smart substitutions come into play.
-
Common Alternatives: No buttermilk? No drama! Just mix 1 cup of milk with a tablespoon of vinegar and let it sit for about 5 minutes. Boom, instant buttermilk!
-
Dietary Modifications: Going dairy-free? Swap out the butter for coconut oil! Your cookies will still be delightful, just a tad different in flavor.
-
Emergency Replacements: Got a veggie that’s wilting in the fridge? Toss it in soup—waste not, want not, am I right?
-
Seasonal Options: Use seasonal veg for the freshest flavor. Think pumpkin in fall and zoodles in summer!
Kitchen Equipment Essentials
Last but certainly not least, we gotta chat about your kitchen tools—those kitchen equipment essentials .
-
Must-Have Tools: A sturdy chef’s knife is number one; it’ll change your chopping game forever. Also, a good mixing bowl and a reliable sheet pan are musts.
-
Alternative Equipment: No food processor? A good ol’ box grater or even just a knife will do the trick for most tasks.
-
Preparation Tips: Always prep your ingredients first. It’s like organizing a cattle guard entrance—make sure everything is in line before starting!
-
Storage Solutions: Invest in some quality containers; nobody wants stale snacks. Clear storage bins show you exactly what you’ve got.
There ya have it, my culinary comrades! with the right essentials on hand, cooking becomes less of a chore and more of a joyride.
Ready to make some magic in the kitchen? let’s dive into the instructions and whip up something delicious together!

Mastering the Art of Professional Cooking
When you think about professional cooking, it might seem a bit overwhelming, right? but trust me, it’s just all about getting everything in order before you dive into the delicious madness.
Let’s break down the essentials of professional cooking methods so that you not only cook like a pro but enjoy the whole process.
Essential Preparation Steps
First off, let’s chat about mise en place . it’s a fancy french term that’s basically about having everything in its place.
You’ll need to measure, chop, and prep all your ingredients before starting. imagine you’re setting up your own “cattle guard entrance” – you want it ready and efficient for whatever's coming next!
Now, onto time management . don’t just wing it! list your steps and focus on tasks. maybe you can prep your veggies while the oven is heating up.
This will save you loads of time and energy. you’ll feel like a well-oiled machine, just like a good ol' cattle grid working flawlessly!
Next up is organization strategies . keep your workstation tidy. use bowls for different ingredients, like a mini cattle facility keeping everything in check.
And don’t forget safety considerations – always handle knives carefully and use hot pads for those sizzling pans. burn fingers are not cool, trust me!
Step-by-Step Process
Alright, here’s where the rubber hits the road. Let’s go step by step.
-
Gather Your Ingredients: Make sure everything is out and ready. No running around like a chicken with its head cut off mid-cook!
-
Control temperature: this is crucial. if you’re baking cookies, preheat your oven to 350° f ( 175° c) . if you’re sautéing, make sure your skillet is hot enough.
You want that sizzle!
-
Timing is Key: Every dish has its perfect cooking time. For instance, cookies usually need 12- 15 minutes . Use a timer! It’s like having a loyal ranch hand keeping watch.
-
Visual Cues for Doneness: Learn to trust your eyes. Don’t just go by time. If something looks golden brown and smells amazing, you’re on the right track!
Expert Techniques
Here's where we get a little fancy. There are some professional methods that can elevate your cooking game.
-
Searing: This locks in flavor. Whether it’s meat or veggies, give them a good sear over high heat before cooking through.
-
Basting: Ever tried basting your turkey? This keeps it moist and flavorful! Just like checking on those cattle guards, keep an eye on your meals.
-
Quality Checkpoints: Taste as you go. Trust me, this is one of the best troubleshooting tips you’ll ever learn. It’s all about making adjustments as you cook.
Success Strategies
Let’s wrap this up with some success strategies. Don’t sweat the small stuff!
-
Common Mistakes to Avoid: Rushing through steps or not tasting. Cooking is all about balance. Take your time.
-
Quality Assurance: Always look for fresh ingredients. Fresh is best, just like a well-built cattle gate – sturdy and reliable!
-
Perfect Results Guide: Keep an eye on cooking temps and timing. A good rule of thumb is to keep a cooking journal. Jot down what worked and what didn’t.
-
Make-Ahead Options: Many dishes can be prepped ahead of time and stored. Think stews or marinated meats. They get better with time.
Cooking professionally isn’t just about technique; it’s about having fun and embracing the process. whether you're whipping up a simple meal or something more complex, remember: practice makes perfect.
Treat it like a new diy stocking holder project – sometimes it takes a few tries to get it just right!
As we dive deeper into this culinary adventure, let’s explore additional information on how to further hone your skills and enjoy your kitchen experience.
Whether you're aiming for that rustic charm or looking to achieve perfect results every time, there's always something new to learn!

Additional Recipe Information for Cattle Guard Cookies
Alright, my fellow cookie ensoiasts! let’s dive into the nitty-gritty of baking these delightful cattle guard cookies . think of them as rustic chocolate and nut treats with a personality, much like the wonderful cattle guards you might stumble across on those long drives through the countryside.
So, grab your mixing bowls, and let’s get down to business!
Pro Tips & Secrets
First things first, a couple of pro tips to make your cookies truly shine!
-
Chill out: don’t skip the chilling step – trust me on this one! it helps the cookies maintain their shape.
If you want them thicker (who doesn’t?), chilling is a must. aim for at least 30 minutes .
-
Mix it up : when you’re creaming the butter and sugars, go for about 3- 5 minutes until it’s super fluffy.
This will help aerate the dough and give your cookies that perfect chewy texture.
-
Flavor Boosters: Add in a pinch of sea salt on top right before baking. Seriously, it makes a world of difference. It balances out the sweetness and elevates the whole flavor profile.
-
Presentation: when serving, why not use a rustic-looking platter? a little bit like a cattle guard entrance, it gives your treats that farm-fresh vibe.
You can also drizzle some melted chocolate over the top for a sweet finish!
Perfect Presentation
Now let’s talk about how to plate these gorgeous cookies. Presentation matters, even if it’s just for your family on a Tuesday night.
-
Color Combinations: Pair dark chocolate with a splash of vibrant colors. Maybe a side of fresh fruit or some colorful sprinkles for a festive touch.
-
Garnish Ideas: Add a few crushed nuts on top for that cozy, rustic vibe. Or sprinkle some powdered sugar to mimic a dusting of fresh snow – very picturesque, am I right?
-
Plating Techniques: Arrange the cookies in a circle with a little space in between. It creates a gorgeous display that invites people to dig in!
Storage & Make-Ahead
If you’re like me, you might want to bake these ahead of time for a family gathering or, let’s be real, just for yourself! Here’s how to save those cookies:
-
Storage Guidelines: Keep your cookies in an airtight container at room temperature. They’ll stay fresh for about 5-7 days .
-
Preservation methods: freeze the dough if you want to make a batch in advance. just wrap it tightly in plastic wrap, and toss it in the freezer.
It lasts about 3 months .
-
Reheating instructions: pop them in the oven at 300° f ( 150° c) for about 5- 10 minutes .
Your cookies will taste just as fresh as the day you baked them!
Creative Variations
Feeling adventurous? Let’s explore a few creative variations to put your spin on these cookies:
-
Nut-Free Version: Skip the nuts altogether or swap in seeds to keep that crunch factor.
-
Flavor Adaptations: How about adding a touch of espresso powder for a mocha flavor? Or sprinkle in some cinnamon for a warm, cozy vibe?
-
Seasonal Twists: For Halloween, throw in some pumpkin spice and decorate them with Disney Halloween decorations to get festive! You can also adapt flavors to match holidays. Think peppermint for Christmas!
Complete Nutrition Guide
Now, while cookies are a treat, it's good to be mindful of what’s in them!
-
Calories: One cookie is around 150 calories . Not too shabby for a sweet treat!
-
Health Benefits: Dark chocolate does have antioxidants, and nuts provide healthy fats, so you can enjoy these in moderation.
-
Portion Guidance: Maybe limit yourself to one or two cookies at a time. Pair them with fresh fruit to balance out that sweetness.
Conclusion
If all this talk about cattle guard cookies isn’t making your mouth water, i don’t know what will! from perfecting the dough to plating with flair, the journey of baking can be just as delightful as devouring these bad boys.
Don’t forget to experiment with your own variations and share them with family and friends. who knows? maybe you’ll inspire a whole new trend of cattle guard-themed treats!
Remember, it’s not just about the end product; it’s about the laughter, the kitchen mess, and making lasting memories. So, get baking and give your taste buds a treat they won’t forget!
Frequently Asked Questions
What are cattle guards in cooking?
In cooking, "cattle guards" refers to a fun and whimsical treat inspired by the rough and tough exterior of actual cattle guards used on farms. These are often represented as cookies or desserts that play with texture and flavour, perfect for rustic or country-themed gatherings!
Can I make cattle guards cookies ahead of time?
Absolutely! You can prepare the cookie dough a day in advance and keep it chilled in the fridge. This not only saves time but also enhances the flavours as they meld. Just remember to let the dough sit at room temperature for about 10-15 minutes before baking to make scooping easier.
What's the best way to store cattle guard cookies?
The best way to keep your cattle guard cookies fresh is by storing them in an airtight container at room temperature. They should last about a week, but trust me, they’ll likely be gone much sooner than that! For a longer shelf life, you can freeze them – just be sure to separate layers with parchment paper.
Can I substitute ingredients in my cattle guards recipe?
Yes, indeed! You can easily substitute the nuts for seeds if you want a nut-free version, or use a gluten-free flour blend for a gluten-free option. Feel free to mix in different chocolate types, or even add spices like cinnamon or espresso powder for a unique twist on the classic flavour!
How do I achieve the perfect texture for my cattle guards cookies?
The key to achieving the perfect texture for your cattle guards cookies is all in the dough preparation! Make sure not to overmix after adding the dry ingredients; you want just a combined mixture for that delightful chewy texture. Additionally, don’t skip the chilling step – it helps maintain their shape and enhances that rustic crunch!
What’s the best way to serve cattle guard cookies?
These delightful cookies go wonderfully with a nice cuppa, whether it's a classic English breakfast tea or a refreshing iced tea. For a sweet treat, serve them warm with a scoop of vanilla ice cream or alongside a fruit platter for a well-rounded afternoon tea experience!

Rustic Cattle Guard Cookies: Chocolate and Nut Treats Card
⚖️ Ingredients:
- 1 cup (226g) unsalted butter, softened
- 1 cup (200g) packed brown sugar
- 1/2 cup (100g) granulated sugar
- 2 large eggs
- 1 teaspoon (5g) vanilla extract
- 3 cups (360g) all-purpose flour
- 1 teaspoon (6g) baking soda
- 1/2 teaspoon (3g) salt
- 1 cup (175g) dark chocolate chunks
- 1/2 cup (75g) chopped walnuts or pecans (optional)
🥄 Instructions:
- Step 1: In a large bowl, cream together softened butter, brown sugar, and granulated sugar until light and fluffy.
- Step 2: Add eggs one at a time, mixing well after each addition. Stir in vanilla extract.
- Step 3: In another bowl, whisk together flour, baking soda, and salt.
- Step 4: Gradually add the dry ingredients to the wet mixture, stirring until just combined. Fold in dark chocolate chunks and nuts (if using).
- Step 5: Cover the dough and refrigerate for at least 30 minutes.
- Step 6: Preheat your oven to 350°F (175°C).
- Step 7: Drop tablespoons of dough onto a lined baking sheet, spacing them evenly.
- Step 8: Bake for 12-15 minutes until edges are golden brown and centers are set.
- Step 9: Allow cookies to cool on the baking sheet for a few minutes before transferring to a wire rack.
Previous Recipe: Easy Ultimate Mac and Cheese Crock Pot Recipe: My Family's Favorite
Next Recipe: Delicious Sugar Biscuits Recipe: A Sweet British Treat You’ll Love